Tuesday, November 29, 2011

Broccoli Basil Mac and Cheese

I'm not out to go out and ruin something perfect like mac and cheese.  I like healthy food, but I like food that tastes good more.  And if it tastes great, all the better.

I used to think that the only way to improve upon mac and cheese was to add bacon.  And perhaps more cheese.

As it turns out, a helping of vegetables actually improves mac and cheese, bringing some depth to the dish.

This isn't like Jessica Seinfeld sneaking vegetables into food for kids, making nobody happy in the process.  This is making a basil crumb topping to brighten the flavors.  This is pulsing together creme fraiche, cheese, and cherry tomatoes to create an irresistible filling.

I'm the first to admit that cutting up a butternut squash isn't my favorite activity, but if you aren't up to the task, feel free to buy some pre-cut squash.  Roasting the squash before adding it to the mac assures that it is completely tender by the time you're digging in.  

This is no "healthified" mac and cheese that takes away everything delicious about mac and cheese.  Instead it just adds to the beauty of an already great dish.  Dig in!

Broccoli Basil Mac and Cheese
Adapted from 101 Cookbooks

1 small butternut (or other winter) squash, peeled, seeded, and cut into tiny pieces
Olive oil
1 bunch of basil, stems removed
2 slices good wheat bread, stale or dried out in oven
Small head of broccoli, roughly chopped
1/2 cup creme fraiche (or sour cream)
3 cups white cheddar cheese, grated
3 cups gruyere, grated
1 pint or yellow cherry tomatoes
3 cups (300 g) dried whole wheat macaroni

Preheat oven to 400 degrees.  Bring a large pot of salted water to a boil.  

Place pieces of squash on a cookie sheet and toss with olive oil, salt, and pepper.  Bake for 20-25 minutes.

Meanwhile, pulse half the basil, all of the dried out bread, the broccoli, and a glug of olive oil in a food processor until a fine crumb forms.  Remove crumbs to a bowl and rinse out the food processor.  

In a separate bowl, combine grated cheese and creme fraiche.

Place the cherry tomatoes and the remaining half of the basil in the food processor.  Pulse a couple of times to break things up.  Stir in the grated cheese and creme fraiche mixture.  

Boil macaroni in salted water until just slightly undercooked.  Drain, reserving one cup of pasta water.  Return the pasta to the pot it was boiled in and stir in the cheese mixture.  Add pasta water, as needed, to thin the mixture to the consistency of cream.  If it is runny, the pasta will soak it up in the oven.

Transfer pasta mixture to a large baking or casserole dish.  Sprinkle with green crumbs.  Bake for 20-25 minutes until the topping is crunchy.  Wait ten minutes before serving.  

Sunday, November 27, 2011

Thanksgiving in Indy

I hope everyone had a fantastic Thanksgiving.  We had an amazing time in Indianapolis with my family.

Somehow I didn't snap pictures of the three desserts I made, but I did get a picture of the twice baked sweet potatoes (pre-second baking) I helped with.

 
The weekend was filled with china, silver, and champagne.  Grown up partying, done right.

The evenings were complete with Mexican train dominoes.  If you haven't played, I highly recommend it. 

Sweet B.J. slept in front of the Christmas tree and everyone gave him a pat whenever they passed.

One of the best parts of the weekend was meeting my cousin's toddler, Kai, for the first time.

He is a doll and smarter than you can even imagine.

He got quite a kick out of going through "B.J.'s door" as he called it.

I had seen lots of pictures of him online, but nothing compares to meeting such an awesome kid in person.

Another weekend treat: my brother and aunt made the family tradition: waffle cookies (gaufrettes).  I had about two dozen in one day.

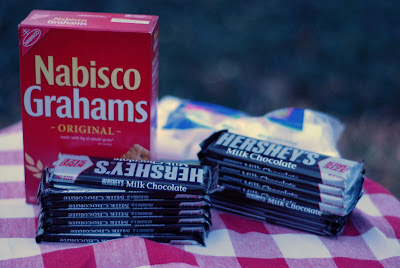
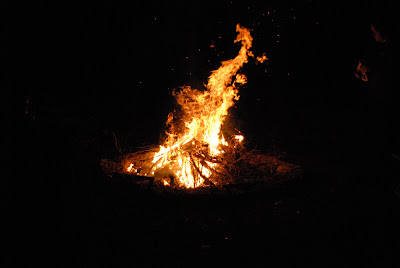
The day after Thanksgiving we had a bonfire with bratwurst and s'mores.

 
It was as awesome as it sounds.

My aunt and uncle live in a magical old home with a beautiful yard that I tried to capture in some photographs.

I've always loved their house, ever since I was a child.  Now, I think I appreciate it even more.

My aunt has a flare for decorating, especially with antique pieces.  If they are original to our family, all the better.

No detail was overlooked this weekend.  Or anywhere you look in the house.  It really is remarkable.

Our farewell brunch wasanother Sittler family tradition - crepes or "big pancakes" as they were known in the family.  I stuffed mine with delectable homemade strawberry jam and powdered sugar.

This picture is as good as any to sum up my wonderful weekend.  Thanks so much for having us, Aunt Ginny and Uncle Bill!  

Monday, November 21, 2011

Apple Tart

Incoming news bulletin:  You Do Not Need To Make That Second Pumpkin Pie.

Why would you make two pumpkin pies when you could make one of these easy and delicious apple tart/galettes?

Everyone likes a little variety, and besides, when there are two different desserts you get to eat two slices.  At Saturday there were four desserts, and I had four slices.  That's how the rules work, people.  Don't judge.

I am making this for one of our three Thanksgiving desserts.  And if you follow Kathy logic...that means I get to eat three desserts on Thursday.  Shucks.

This was actually my first time making "real" crust.  I followed the recipe closely (though I needed less cold water than it called for) and the dough came together more simply than I ever imagined.  Rolling out the crust is much easier than rolling out most other things I have rolled out, too.  Who knew pie crust was actually not rocket science?  (Almost everyone, it turns out, knew this before me.)

I don't have a tart pan (hint, hint), so I just threw it together in a pie dish lined with parchment paper.  In the end I just let people grab slides from the dish instead of using the overlapping parchment to lift the galette out. The pieces came out surprisingly smoothly.

The recipe is super simple and perfect just as it is.  No cinnamon is even added (though you can if you want), which will please my cinnamon-hating-but-apple-pie-loving dad.  It tastes just like the ingredients - butter, sugar, and apples - coming together in a bubbly mass straight out of your oven.

So spread the word, this apple tart is perfect for you Thanksgiving table, or any fall table.  It's just a tad more complicated than an apple crisp, but much more festive and beautiful.  That's news that's fit to print.

Alice Water's Apple Tart
Adapted from Smitten Kitchen

Dough:
1 cup unbleached all-purpose flour
1/2 teaspoon sugar
1/8 teaspoon salt
6 tablespoons unsalted butter, just softened, cut into 1/2 inch pieces
3-3 1/2 tablespoons chilled water

Filling
2 pounds apples, peeled, cored, and sliced thinly
2 tablespoon butter, melted
5 tablespoons sugar

Mix flour, sugar, and salt in bowl of stand mixer.  Add two tablespoons of butter and mix until the dough resembles coarse cornmeal.  Add the remaining 4 tablespoons of butter and mix until the biggest pieces are the size of peas.  Dribble in the water one tablespoon at a time until the dough just holds together while mixing on low.  Form the dough into a ball and flatten into a 4-inch disk.  Refrigerate the dough for at least 30 minutes.

Preheat oven to 400 degrees.

While the dough is chilling, peel and slice apples.

Remove dough from refrigerator and allow to soften a minute.  On a lightly floured surface roll out dough to form a 14-inch disk that is 1/8 inch thick.  Dust off excess flour from the dough with your hands.

Place dough in a 9-10 inch tart pan or 9-10 inch pie dish lined with overlapping pieces of parchment.  Place apples in a ring around the edge of the dish and then fill in the center circle with apples.  (I had leftover apples - perfect for snacking!)  Fold excess dough over the top of the apples.

Brush 2 tablespoons of melted butter over apples and dough.  Sprinkle roughly 2 tablespoons of sugar on the edge of the dough and 3 tablespoons of sugar over the apples.

Bake for 45 minutes, until the dough and apples have browned.  Rotate every 15 minutes.  Allow to cool for at least 15 minutes before digging in.

Sunday, November 20, 2011

Mashed Potato Casserole

It's Thanksgiving week, people, and it's time to start figuring out how you're making your mashed potatoes.  Not if you are making them - not making them is not an option.

The beauty of this casserole is that you can still have mashed potatoes on Thanksgiving without standing at the stove, a masher in hand, when your guests are pretending to patiently wait for dinner.

The thing about mashed potatoes is that they don't really keep well.  If you mash them earlier in the day, they will be stiff and gluey by the time dinner rolls around.  And then, what's the point?

Mashed potato casserole is the perfect make-ahead dish because you can actually make it tonight (i.e. a few days before Thanksgiving) and then bake it off on Thanksgiving to share with your family.  I admit it's not exactly the healthiest recipe I've ever posted, but this is mashed potato casserole, guys.

On Saturday morning I got up at 7:30 and left about a pound of butter on my counter to soften while I went to the gym.  I needed the gym.  I was softening a pound of butter and planning on using about a pound and a half that day.  That's my kind of day.

Natalie and Mitch were having their annual pre-Thanksgiving potluck and I was bringing mashed potato casserole, crack pie, and apple tart.  No, we didn't need all those dishes, but I wanted to make them.  It's hard for me to explain to people why I love cooking so much, I just do.  I enjoy it so much that I will prepare so much food to bring to a potluck that I am cleaning out my stand mixer four times in one morning to get through all my recipes.  I guess I didn't love peeling 6 pounds of potatoes, but I didn't hate it either.  Just being in the kitchen with my toes getting covered in flour and my knuckles getting sore from all the chopping makes me happy.  Even if you're not a cooking fanatic, I promise that you'll enjoy at least the eating aspect of this mashed potato casserole.  The accolades around the Thanksgiving table are well worth the effort.

Mashed Potato Casserole
From the NY Times

14 tablespoons unsalted butter, softened
6 pounds Yukon Gold potatoes, peeled and cut into 1-inch pieces
2 tablespoons, plus one teaspoon kosher salt
1 1/2 cups sour cream
1 teaspoon black pepper
6 tablespoons finely chopped fresh chives
2/3 cup bread crumbs
2/3 cup freshly grated Parmesan

Lightly grease a 9x13 pan with butter.  In a large pot, bring the potatoes, roughly 4 quarts of water, and 2 tablespoon of kosher salt to a boil.  Boil 15-20 minutes, until tender.  Drain potatoes.

Mash the potatoes with 10 tablespoons of butter, sour cream, 1 teaspoons salt, and 1 teaspoon pepper.  Stir in the diced chives.  Taste for seasoning.  Spread potatoes into greased pan.  Cover and refrigerate for up to three days or use immediately.

In a small bowl mix together the remaining 4 tablespoons butter, bread crumbs, and Parmesan cheese until coarse crumbs form.  Crumbs can also be refrigerated for up to three days or used immediately.

Heat oven to 400 degrees.  Sprinkle crumbs on potatoes and bake for 30-40 minutes until crumbs are crispy and brown.  If baking the casserole right away (instead of out of the fridge), you can bake it for 20 minutes instead.
Related Posts with Thumbnails