Showing posts with label Desserts. Show all posts

Monday, November 21, 2011

Apple Tart

Incoming news bulletin:  You Do Not Need To Make That Second Pumpkin Pie.

Why would you make two pumpkin pies when you could make one of these easy and delicious apple tart/galettes?

Everyone likes a little variety, and besides, when there are two different desserts you get to eat two slices.  At Saturday there were four desserts, and I had four slices.  That's how the rules work, people.  Don't judge.

I am making this for one of our three Thanksgiving desserts.  And if you follow Kathy logic...that means I get to eat three desserts on Thursday.  Shucks.

This was actually my first time making "real" crust.  I followed the recipe closely (though I needed less cold water than it called for) and the dough came together more simply than I ever imagined.  Rolling out the crust is much easier than rolling out most other things I have rolled out, too.  Who knew pie crust was actually not rocket science?  (Almost everyone, it turns out, knew this before me.)

I don't have a tart pan (hint, hint), so I just threw it together in a pie dish lined with parchment paper.  In the end I just let people grab slides from the dish instead of using the overlapping parchment to lift the galette out. The pieces came out surprisingly smoothly.

The recipe is super simple and perfect just as it is.  No cinnamon is even added (though you can if you want), which will please my cinnamon-hating-but-apple-pie-loving dad.  It tastes just like the ingredients - butter, sugar, and apples - coming together in a bubbly mass straight out of your oven.

So spread the word, this apple tart is perfect for you Thanksgiving table, or any fall table.  It's just a tad more complicated than an apple crisp, but much more festive and beautiful.  That's news that's fit to print.

Alice Water's Apple Tart
Adapted from Smitten Kitchen

Dough:
1 cup unbleached all-purpose flour
1/2 teaspoon sugar
1/8 teaspoon salt
6 tablespoons unsalted butter, just softened, cut into 1/2 inch pieces
3-3 1/2 tablespoons chilled water

Filling
2 pounds apples, peeled, cored, and sliced thinly
2 tablespoon butter, melted
5 tablespoons sugar

Mix flour, sugar, and salt in bowl of stand mixer.  Add two tablespoons of butter and mix until the dough resembles coarse cornmeal.  Add the remaining 4 tablespoons of butter and mix until the biggest pieces are the size of peas.  Dribble in the water one tablespoon at a time until the dough just holds together while mixing on low.  Form the dough into a ball and flatten into a 4-inch disk.  Refrigerate the dough for at least 30 minutes.

Preheat oven to 400 degrees.

While the dough is chilling, peel and slice apples.

Remove dough from refrigerator and allow to soften a minute.  On a lightly floured surface roll out dough to form a 14-inch disk that is 1/8 inch thick.  Dust off excess flour from the dough with your hands.

Place dough in a 9-10 inch tart pan or 9-10 inch pie dish lined with overlapping pieces of parchment.  Place apples in a ring around the edge of the dish and then fill in the center circle with apples.  (I had leftover apples - perfect for snacking!)  Fold excess dough over the top of the apples.

Brush 2 tablespoons of melted butter over apples and dough.  Sprinkle roughly 2 tablespoons of sugar on the edge of the dough and 3 tablespoons of sugar over the apples.

Bake for 45 minutes, until the dough and apples have browned.  Rotate every 15 minutes.  Allow to cool for at least 15 minutes before digging in.

Tuesday, November 8, 2011

Caramel Chocolate Pumpkin Blondies

"Fall Foods for $300, please."
"A handheld pumpkin dessert better than cookies."
"What's caramel chocolate pumpkin blondies?"
"YES!"

Oh did you miss that episode of Jeopardy?  Well, I'm pretty sure that happened.  

These blondies start with a cakey layer of pumpkin...

Which is followed by a thick dose of caramel and oodles of chocolate chips.  It's topped with another layer of cakey pumpkin before being popped in the oven.

Out of the oven comes an ooey gooey fall treat not to be matched.  It definitely is the answer to Your Coworkers Will Love You for $600.

I made this as dessert for a dinner party we had a couple weekends ago.  Paired with sweet pepper soup and broccoli basil mac and cheese, it was the perfect fall meal.

I've never been much of a Jeopardy watcher (we don't really have the TV on at 7:00 PM), though I did enjoy the Nintendo video game in my youth.  I doubt I would've succeeded on any food questions back then, but nowadays I've got Fall Foods covered.  With this recipe, now so do you!

Caramel Chocolate Pumpkin Blondies

3/4 cups butter, softened
1 cup brown sugar
2 eggs
1 teaspoon vanilla extract
1 cup pumpkin puree
1 teaspoon cinnamon
1/2 teaspoon nutmeg
1 3/4 cups flour
1 teaspoon baking soda
1/4 teaspoon salt
1/2 cup semi-sweet chocolate chips
1 12 oz. jar caramel (or 14 oz bag of caramels and 1/4 cup cream)

Preheat oven to 350 degrees.  Grease a 9x13 baking sheet.

Cream softened butter and brown sugar until light and fluffy.  Mix in eggs, vanilla, and pumpkin until combined (it will be very oozy at this point).  Add in cinnamon and nutmeg.  Slowly add in 1 3/4 cups flour until just incorporated.  

Pour 2/3 of this batter mixture into your greased pan.  Sprinkle chocolate chips evenly over batter - use as much as you'd like.  If using a jar of caramel sauce, simply pour evenly over the chips and batter.  If using caramels, unwrap a bag of caramels and place in a microwave safe bowl with 1/4 cup cream.  Microwave in 20 second intervals until completely melted, stirring every 20 seconds.  Place dollops of remaining pumpkin batter over caramel layer and spread evenly with a knife or spatula.  

Bake for 25 minutes until a toothpick comes out clean (other than some caramel).  Cool completely before serving.

Thursday, September 1, 2011

Chocolate Cheesecake Frosting

When someone bites into a baked good that you made right in front of you, they are somewhat obligated to say they like it.  Unless the person is horribly cruel or the type of person with whom you can be brutally honest, there is only one response to that first bite: "This is great, thank you!"

Now don't get me wrong, I don't take issue with people having manners.  I'm glad this is the state of the world, because I don't think I could handle it any other way.  It just means that you never know if the compliment is genuine or forced.  John can attest that I sometimes question his "This is great" comments at dinner with "Really?  Are you sure you like it?"  From him I always want the truth.

This is why when someone asks me to bake something for a birthday, I take it as the highest compliment.  That's how you know they like what's coming out of your oven.  For Natalie's birthday a couple weeks ago, Mitch asked me to bake the dessert for her party.  Originally I was thinking a cake, but I decided on cupcakes since they are so much easier to eat standing around (and frankly, must easier to make).

Since these were the "official" cupcakes of the party, I figured it was high time I went out and bought pastry bags and tips for icing the cupcakes.  And hell, if I'm at Sur La Table already, I might as well buy some chocolate sprinkles.

Natalie's only request was cream cheese icing.  I iced half the cupcakes with standard cream cheese icing and for the second half I decided to make chocolate cheesecake frosting.  It still had the cream cheese, but with a hefty dose of cocoa it is transformed into chocolate cheesecake.

Who doesn't love chocolate and who doesn't love cream cheese icing?  Find me this person and I will gladly stuff their face with this frosting.

This icing is so good that I promise you won't be questioning anyone's compliments.  All praises will definitely be genuine.

Chocolate Cheesecake Frosting
From How Sweet It Is

1/2 cup butter (1 stick), softened
8 oz (1 package) cream cheese, softened
1 tablespoon vanilla extract
4 cups powdered sugar
1/3 cup dark cocoa powder
(1-2 tablespoons of milk, if needed)

Beat butter and cream cheese together in a stand mixer until well combined.  Stir in vanilla until incorporated.  On low speed, mix in powdered sugar 1/2 cup at a time.  Beat in cocoa powder, increasing the speed to make sure everything is well combined.  If too thick, mix in milk 1 teaspoon at a time.  If too thin, add in additional sugar.  Use to top your favorite cake or cupcakes!

Monday, August 22, 2011

Toffee Blondies

Other than one fateful summer where I got blonde highlights, I've been very much a brunette my whole life.  I'm really not a hair person to begin with, so the idea of having to constantly visit the salon for touch-ups is about as high on my list as my desire to clean out the bottom of my trashcan.

Despite my allegiance to brown hair and brownies, I have to say, occasionally blondies really do have more fun.

Blondie batter itself is more delicate in flavor than uber-chocolatey brownies, so the mix-ins you add to it can really stand out more.  Enter: toffee and walnuts.

These toffee blondies are better than almost any brownie in my book, and I could not stop eating them.

John doesn't eat blondies, or toffee for that matter, so luckily I had some neighbors with which to share these addictive treats.

I loved these so much I was eating them for breakfast and justifying it by their shape, color, and inclusion of walnuts: "It's like a tasty granola bar!"  Isn't it nice when you bake something so delicious that there's nothing you'd rather be eating?  Browned butter combined the toffee and walnuts makes for a winning combination in my book.  I hope you too are enticed to bake these blondies - if you like toffee, I promise they will be the best you've ever had.  We can go blonde together.

Toffee Blondies
From Eat Live Run

1 stick of unsalted butter
1 cup packed dark brown sugar
1 egg
1 cup flour
1/2 teaspoon salt
1 teaspoon vanilla extract
1/2 cup toffee bits (I used Heath Bits O' Brickle)
1/2 cup roughly chopped walnuts

Preheat the oven to 350 degrees and grease a 8x8 pan (this makes for a thing blondie already, so if you use a 9x9 pan be sure to reduce the baking time).

Melt one stick of butter over medium heat in a saucepan until lightly brown in color, stirring constantly.  Be careful not to burn the butter.

Add browned butter into the bowl of a stand mixer and beat with 1 cup packed dark brown sugar for about 3 minutes.  Add 1 egg and beat until incorporated.  Add flour, salt, and vanilla all at once and beat until just combined.  By hand, mix in toffee bits and chopped walnuts.  Spread batter (it will be thick) into greased pan and bake for 25 minutes.

Monday, July 18, 2011

Double Chocolate Zucchini Bread

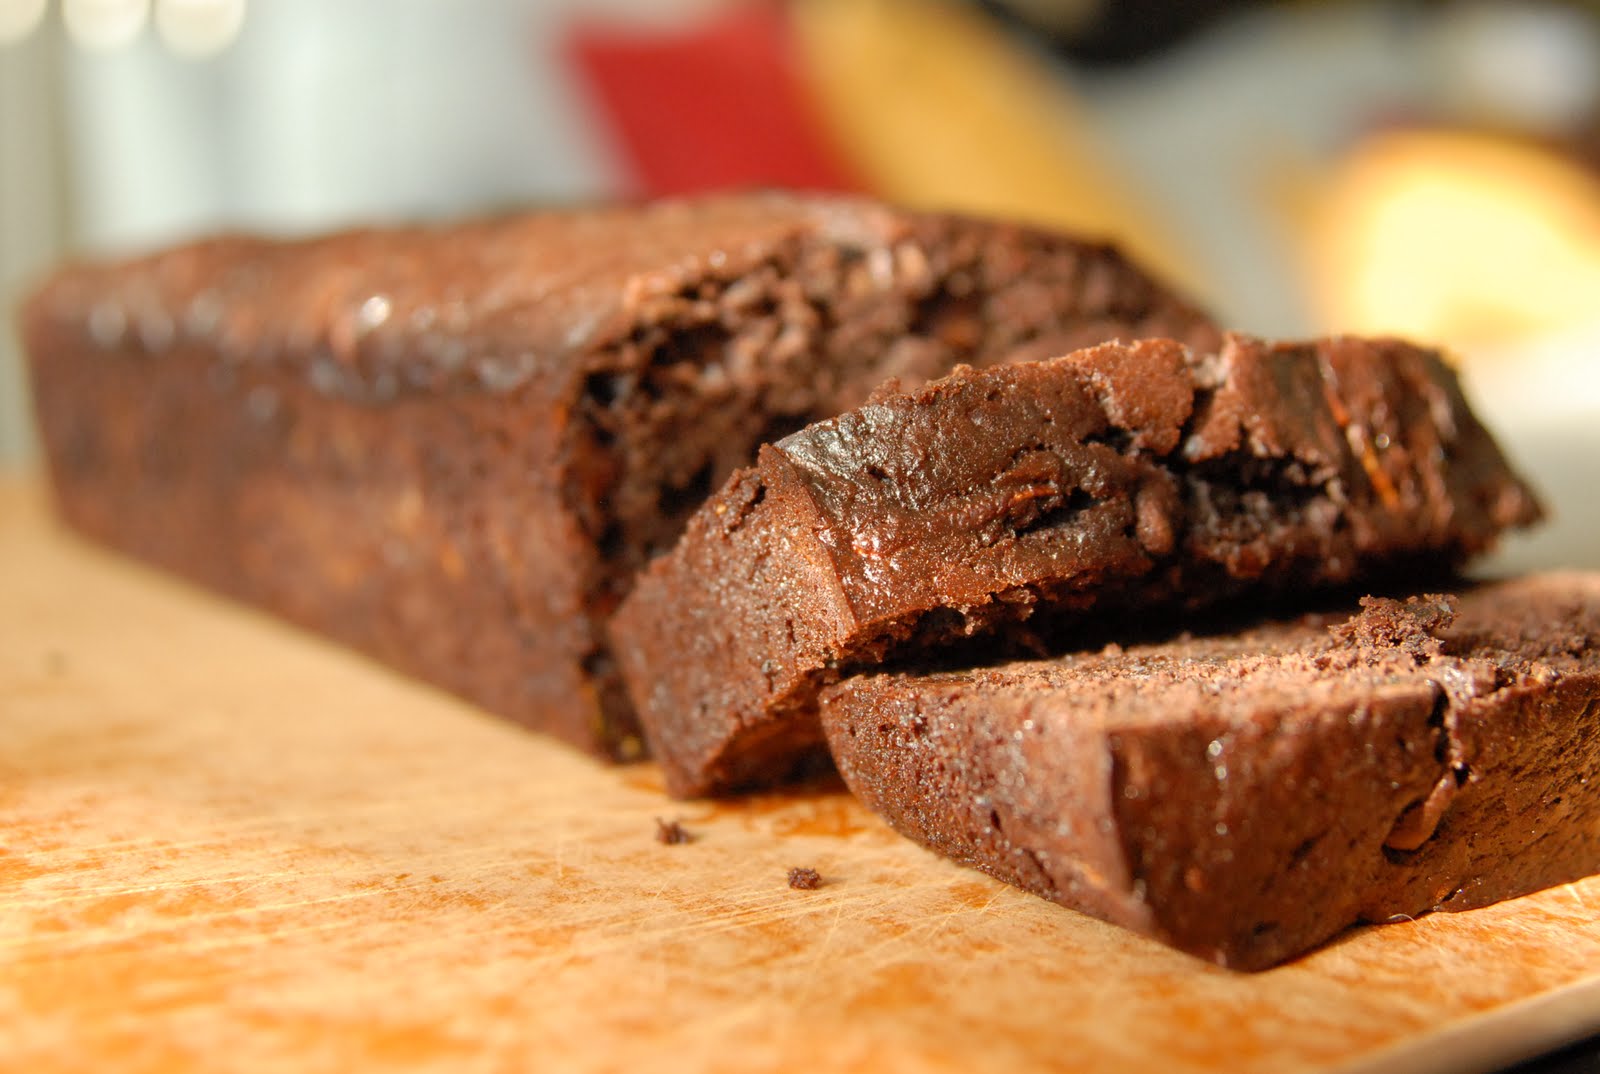
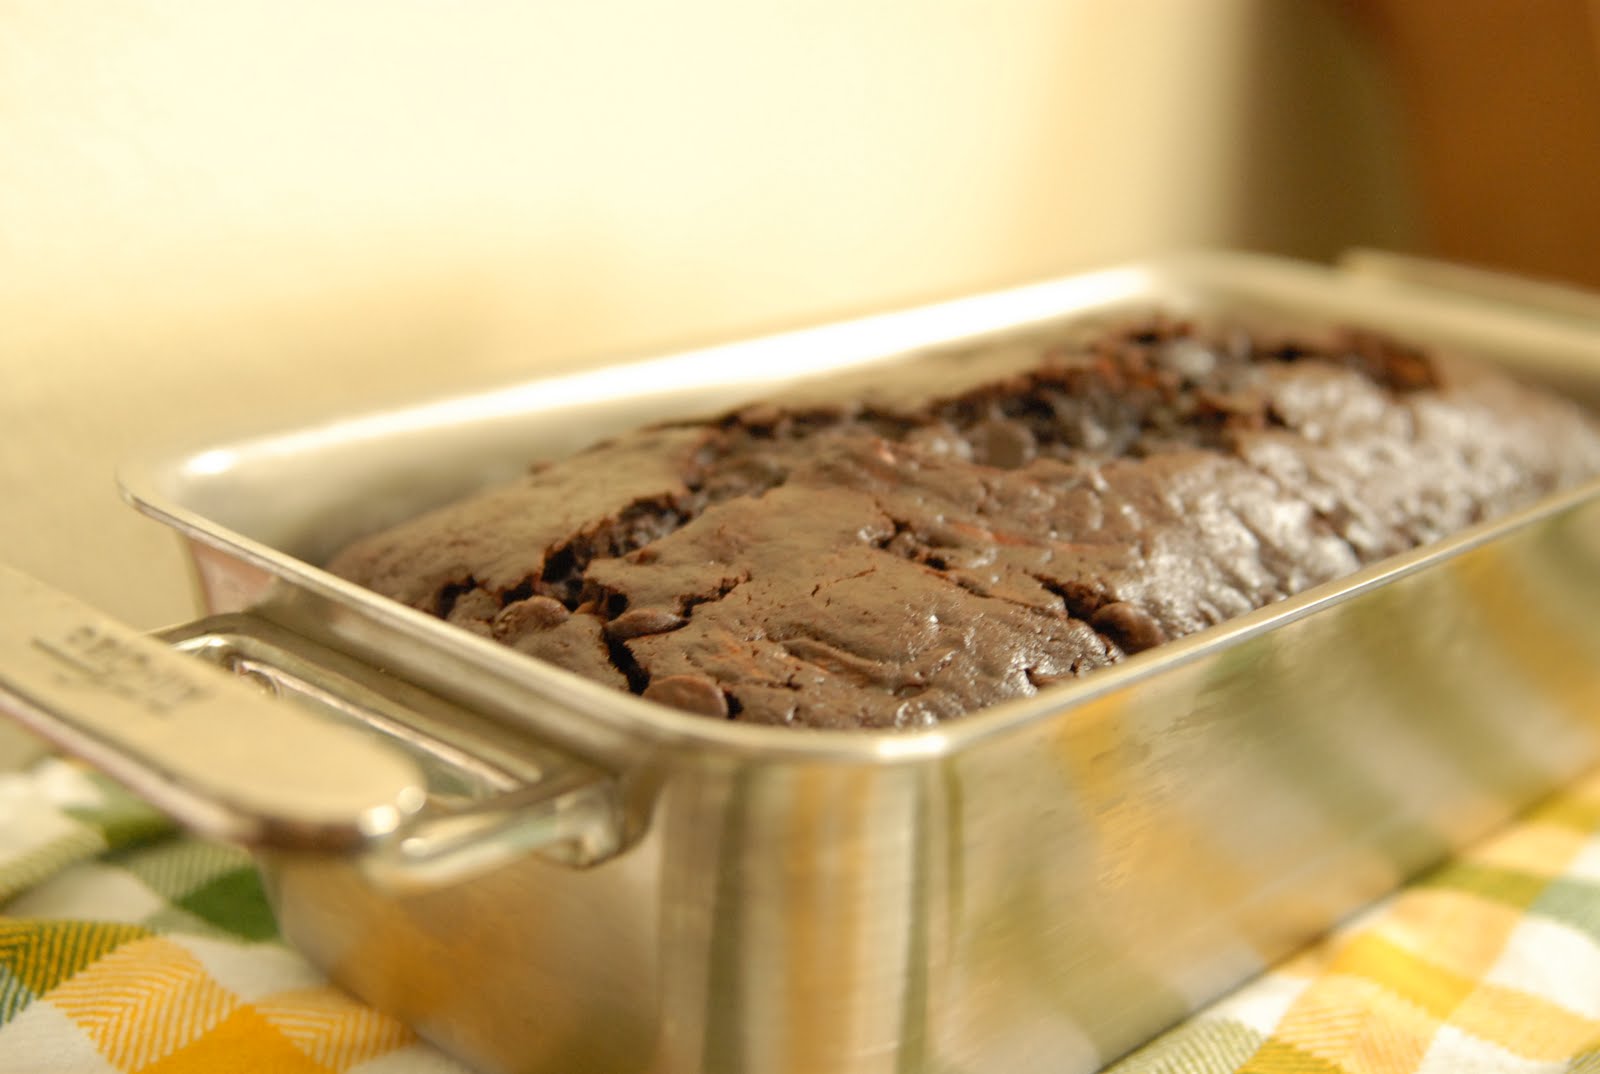
Zucchini bread is healthy, right?  I mean it has zucchini in it, so it must be.  Sorry to get all Jessica Seinfeld on you here.  I merely set out to make some zucchini bread while I was inspired by the fresh (and cheap!) zucchini at the market, and instead I made something that is bread in name-only but cake at heart.

There are zucchini bread recipes of all kinds on the web, but why bother making any other kind once you know you can make one with not one, but two types of chocolate?

I brought most of this loaf into work, and I left a Post-It explaining what it was - lest someone find a teeny piece of something green and wonder how that got into their rich chocolate cake.  This zucchini bread disappeared faster than if I had just called it brownies!

People probably allowed themselves seconds because they felt they might not get home in time to have a good dinner (hey, that happens at law firms), and they might as well have some zucchini, at least.  I fully endorse this backwards thinking because this "bread" is worth eating and savoring wholeheartedly, ditching guilt on the side.  It tastes like a decadent brownie and the buttermilk, oil, and zucchini all keep it from getting dried out.  Get yourself in the kitchen immediately and whip up this easy and delicious zucchini bread - I promise it will be the best one you've ever had.

Double Chocolate Zucchini Bread
From Baking Bites

2 cups flour
1/2 cup unsweetened cocoa powder
1 cup sugar
2 teaspoons baking powder
1/2 teaspoon salt
2 large eggs
1/3 cups vegetable oil
3/4 cup buttermilk
1 teaspoon vanilla
2 medium zucchini shredded (done easily with a food processor), about 1 1/4 cups
1 cup chocolate chips

Preheat oven to 350 degrees.  Grease a 8x5 or 9x5 loaf pan with butter.  Set aside.

In a large bowl sift together 2 cups flour, 1/2 cup unsweetened cocoa powder, 1 cup sugar, 2 teaspoons baking powder, and 1/2 teaspoon salt.  In a medium bowl whisk together 2 large eggs, 1/3 cup vegetable oil, 3/4 cups buttermilk, and 1 teaspoon vanilla.  Add your wet ingredients to your dry ingredients and stir until just combined.  Add in shredded zucchini and 1 cup chocolate chips and slowly mix it into the batter until incorporated.  Pour batter into prepared loaf pan and bake at 350 degrees until a toothpick comes out of the center clean or with a few moist crumbs - about 50-60 minutes.  Cool in pan and invert over a cookie rack to extricate from the pan before slicing.

Wednesday, July 13, 2011

Heath Bar Cookies

I have the most unfortunate seat in the office.  A seat located directly opposite the secretary who is the keeper-of-the-candy.  Every morning she refreshes the candy bowl with fresh candy, and the selection varies every couple of weeks.  This isn't the cheap stuff like peppermints and the like.  It's Kit Kats and Snickers bars and Butterfingers.  I can literally see the candy bowl ALL DAY LONG.

A few weeks back the secretary had mini heath bars - something I was happy not knowing existed.  These little suckers were delicious and addictive.  It's a bad sign when everyone in the office learns your candy bar of choice. When you are eating all the Heath bars out of the bowl every day, you know you have a problem.

Right around the time the mini Heath bar stash ran out, I decided to make these incredible cookies.  If you like toffee, you will adore these guys.  They are chocked full of plain toffee pieces and chopped up Heath bars.  Because toffee's perfect compliment is nuts, 1/2 cup of walnuts are tossed in for good measure.

I love toffee and I love cookies, so these morsels rank pretty highly in my list of Best Things on the Planet.  Next to John and Harper.  Behind John and Harper, of course.  It's best if I don't say how far behind.

Heath Bar Cookies
Adapted from Simply Recipes

2 1/2 cups flour
1 teaspoon salt
1 teaspoon baking soda* (see note)
1 cup (2 sticks) unsalted butter, softened
1 1/2 cups sugar
2 eggs
1 teaspoon vanilla
1 package Heath toffee bits
3 Heath bars, chopped
1/2 cup chopped walnuts

Sift together flour, salt, and baking soda.  In a separate bowl combined chopped walnuts, chopped Heath bars, and toffee bits.  

With a stand mixer, beat butter and sugar together for two minutes on medium speed.  Beat in eggs, one at a time, and then beat in vanilla.  Alternate between mixing in 1/3 of the flour mixture and 1/3 of the Heath mixture until just blended. (Adding chunks to a stand mixture will cause it to work a little harder, but it works fine.)

Refrigerate your batter for at least 30 minutes.  Preheat oven to 350 degrees.  Line cookie sheets with parchment paper and place 1-inch dough balls 3 inches apart to avoid them spreading into one another.

Bake 10-12 minutes until edges begin to brown.  Cool on cookie sheets for a few minutes and then remove to a wire rack to cool completely. 

*Many commentors on the Simply Recipes post complained of flat cookies and suggest substituting baking powder.  Well, I used baking powder and still had flat cookies, so I'm not sure there is a solution.  The depth of the cookies is inconsequential once you taste these beauties, anyway.  

Tuesday, June 28, 2011

Brown Butter Berry Bars

Brown butter berry bars.  Try to say that three times fast.  It's no she-sells-sea-shells, but it's pretty close.  I used to get quite a kick out of the seashell store called She Sells Sea Shells in Sanibel Island when I was a kid.  We went there many a time to add to our shell collections, and I'm sure the name didn't hurt when enticing kids to venture in.

The name "brown butter berry bars" should entice my readers pretty easily too, I would imagine.  Browned butter is heaven on earth and baked goods made with it have an even richer, deeper flavor, I find.  The berries are perfect this time of year.  I happened to use my fresh-picked boysenberries, but I left that out of the title because "brown butter boysenberry bars" just sounds plain silly.  And as for the bar-aspect of this dessert, doesn't everyone love a dessert you can eat on the go?

These bars have a delicious crispy shortbread crust on the bottom that is topped with a creamy browned butter mix and delicious, ripe berries.  It's almost cheesecake-esque but without the cream cheese flavor.

Natalie and I originally made these bars with the cherries we picked, and I decided the recipe was so good that I would make it with my boysenberries too.  Good call, me.  I think these bars were even better with berries than with cherries, but that's because I think berries improve upon cooking but cherries don't.

This recipe can be made with any berry you have around.  If you use tart berries like I did, you will probably want to sprinkle an extra couple teaspoons of sugar on the berries before you pour on the filling.  If you use raspberries, you probably won't need this extra step.  This recipe works equally well with ungodly amounts of berries as it does with just a couple handfuls - feel free to customize for your fruit preferences.  The name, however, must stay as it is, because everyone loves a good tongue twister.  

Brown Butter Berry Bars
Adapted from Smitten Kitchen

Makes 16 2-inch bars

Crust:
7 tablespoon butter, melted
1/3 cup sugar
1/4 teaspoon vanilla extract
1 cup plus 1 tablespoon flour
Pinch of salt

Filling:
1/2 cup sugar
2 large eggs
Pinch of salt
1/4 cup flour
1 teaspoon vanilla extract
1 stick butter, cut up into cubes
At least two large handfuls of berries - I would suggest at least two clam shells

To make the crust:
Preheat oven to 375 degrees.  Line 8x8 or 9x9 baking pan with parchment paper - use two overlapping rectangles so the paper covers the sides as well.

Mix together melted butter, sugar, and vanilla in a small bowl.  Then add in flour and salt and mix until incorporated.  Add dough to papered pan and use fingers or a spatula to press the dough evenly into a thin layer in the pan.  Bake a 375 degrees until just lightly browned, about 18 minutes.  When done, cool the crust in the pan before adding the filling.

To make the filling: 
Cook butter in a small saucepan over medium heat until light brown in color.  Stir often and be careful not to burn it.  The browning will take at least five minutes, maybe more.  Once browned, remove the butter to a glass measuring cup to cool slightly. 

In a medium bowl whisk sugar, eggs and salt.  Add flour and vanilla and whisk until well incorporated.  Slowly stir in browned butter until smooth.

Arrange berries on top of crust and pour filling over top.  Bake at 375 until a tester comes out clean, roughly 35 minutes or so.  Cool completely in the pan and then remove the bars for slicing using the parchment paper overhang.  After a day the bars need to be kept in the fridge.  

Monday, May 16, 2011

Easiest Strawberry Ice Cream

It's ice cream season again, people.  This can't possibly make you as happy as it make me, because I am ecstatic.  Ice cream is one of my all-time favorite foods and it allows for almost endless possibilities in the kitchen with my handy-dandy ice cream machine.  John wishes I would stick to plain chocolate, but in the wonderful words of HIMYM..."No can dos-ville, babydoll!"

This year I decided to ease into ice cream making season by making a no-fuss ice cream recipe, probably one of my easiest ever.  There are no eggs, so no cooking is required - yippee!  There is no straining, because we just don't care enough to get the seeds out - hooray!  (Honestly the seeds aren't noticeable)  There are only five ingredients, and none of them are fancy - woohoo! 

We had this book growing up that my dad would read to me and my brother before bed - it was called Simple Pictures Are Best.  I can't remember the details of the book, but that saying has really resonated with me my whole life.  My mom and I would say it to each other when making posters for projects, hanging up frames on a wall, or drafting the family Christmas card letter.  Simple pictures are best, and that's why this ice cream is so perfect. 

There is a time and a place for fancy ice cream, but this classic recipe did the trick last weekend.  It tastes exactly like you want and imagine homemade strawberry ice cream to taste like.  Like summer.

So go buy the juiciest strawberries you can find and break out your ice cream maker that was collecting dust.  It's ice cream time!


Easiest Strawberry Ice Cream
From A Cozy Kitchen

1-1 1/4 pounds strawberries, leaves removed and halved if large
3/4 cup sugar
3/4 teaspoon fresh lemon juice
1/8 teaspoon salt
2 cups heavy cream

Place strawberries in a blender and puree until smooth.  Add sugar, lemon juice and salt to blender and mix a bit with a spatula.  Add the 2 cups cream to the blender and puree until smooth.  Cover and place blender bowl in fridge for 1-3 hours, until very cold.  Churn in ice cream machine according to instructions (~40 minutes on mine).  Place in freezer to firm and remove 10 minutes before scooping to allow it to soften.

Tuesday, April 5, 2011

Fudge Cake with Chocolate Ganache

You can tell a lot about a recipe by the ingredients, and I'm becoming better and better at deciphering how good a recipe will be by looking at the list of ingredients.  Well, folks, take a look at this ingredient list and prepare to know the truth.  One pound of chocolate is used in the icing alone.  One.  Pound.  Of.  Chocolate.  How could the ganache be anything but heavenly with one pound of chocolate?

The cake itself is no slouch either and used an entire container of unsweetened cocoa powder as well as another three ounces of chocolate.  Yes, people, this is a chocolatey dessert in the best of all possible ways.  I made this light little cake as a way to belatedly celebrate John's birthday when we got together with Natalie and Mitch.

The cake itself comes together almost like a brownie mix does (though it is slightly more complex).  All the wet ingredients are mixed together into one big muddy pool and then all the dry ingredients are added in at once.  The prevalence of wet ingredients means that the final mixing step comes together in a flash and the batter pours easily into your cake pans.  I had a bit of trouble with one of my pans sticking, so make sure you use lots of butter, or better yet lots of butter and a spring-form pan.  With some wiggling of a knife and some banging on the counter the cake finally released itself from stuck-pan-hell and the tasters were none-the-wiser.  Harper, however, was a bit perplexed by my banging.

Because I don't have any cake decorating supplies to spell out a happy birthday message, I topped this rich chocolate treat with peanut butter chips.  It created the illusion that I actually did some work in decorating, when really I only did work in the making.  Baking a cake from scratch requires serious effort, but the results are incomparable.  Better yet, I suppose, is marrying someone who makes such a cake for you, but I guess at least one of us lucked out in that regard.

Fudge Cake with Chocolate Ganache
From Gourmet via Epicurious

For the cake:

3 oz. good-quality semisweet chocolate, chopped finely
1 1/2 cups hot coffee
3 cups sugar
2 1/2 cups flour
1 1/2 cups unsweetened cocoa powder (not Dutch processed)
2 teaspoons baking soda
3/4 teaspoon baking powder
1 1/4 teaspoons salt
3 large eggs
3/4 cup vegetable oil
1 1/2 cups buttermilk (well shaken)
3/4 teaspoon vanilla

For the ganache:
1 pound good-quality semisweet chocolate
1 cup heavy cream
2 tablespoons sugar
2 tablespoons light corn syrup
1/2 stick (1/4 cup) butter, cut into pieces

For the cake layers:
Preheat oven to 300 degrees and grease two 10-inch pans with butter.  Line bottoms with rounds of wax paper and grease paper with more butter.

Finely chop 3 oz. chocolate and mix with 1 1/2 cups hot chocolate.  Let the mixture sit and stir occasionally until the chocolate is completely melted.  The mixture should be smooth.

In a large bowl sift together sugar, flour, cocoa powder, baking soda, baking powder, and salt.  In another bowl beat eggs using an electric mixer until lemon-colored (3 minutes using a stand mixer and 5 minutes using a hand mixer).  Slowly add oil, buttermilk, vanilla, and chocolate-coffee mixture to eggs, beating until well-combined.  This will be very soupy.  Add entire sugar mixture and beat on medium speed until just combined well.  Divide evenly between the two pans (if you have a scale, you can compare the weight of the pans to see if you have the same amount of batter) and bake on the middle rack for an hour and ten minutes until a tester comes out clean.

Cool the cake layers complete in pans on racks.  Run a knife around the edge of the pans and invert pans onto racks.  Carefully remove the cake and the wax paper and cool the cake completely.

For the ganache:
Finely chop chocolate.  In a saucepan bring cream, sugar, and corn syrup to a boil over medium-low heat, whisking until the sugar dissolves.  Remove pan from heat and add in the finely chopped chocolate.  Whisk until chocolate is completely melted.  Add in butter and mix until smooth.

Place ganache in bowl to cool, stirring occasionally until spreadable (you might need to put it in the fridge for a bit).  Spread ganache in between layers and on sides and top.  Cake keeps, covered and chilled, for up to three days.  Tastes best if brought to room temperature before serving.

Sunday, April 3, 2011

Bampa's Crepes

Out of all the recipes I have ever made, this one is probably steeped in the most family history, of both my own childhood and my mom's.  I was gifted a set of family recipes from my aunt when I got engaged, and this recipe was among them.  When my mom and aunt were growing up, their father made these "big pancakes" every Saturday for them like he used to have as a boy.  All the crepes were made at once and kept warm in a low oven, tempting them with their sweet smell through the whole process.  The "pancakes" were folded and filled with jam or sugar and devoured by the two young Sittler girls.

I'm not sure I quite understood it at the time, but my father continued this tradition and made me and my brother crepes every weekend through our childhood.  I was partial to strawberry jam filling (and probably would refuse any substitutes) whereas my brother preferred maple syrup.  The batter needs to rest for about an hour after you mix it and before you crepe it, which worked out perfectly in our family because my dad always wakes up before the sun rises.

I'm not sure if Bampa was such an early riser, though.  "Bampa" was what we called my grandpa.  I only have four cousins and the eldest pronounced "Grandpa" closer to "Bampa."  The name stuck for the rest of us kids, and that's the only way I've ever known him.  When I see black licorice I think of him, and when I make these crepes he's right there with me.

I'm not sure what ingredients are usually found in crepes, but this recipe is minimalistic and allows you to dress the crepes up how you prefer, and let those ingredients shine.  I opted for a chocolate peanut butter spread (like Nutella) and raspberry jam (in separate crepes).  John likes to differentiate himself, just like my brother did, by choosing something different and going with plain powdered sugar.  However you dress them, these crepes make for a wonderful weekend treat that would make my Bampa proud.

Bampa's Crepes
A Sittler Family recipe

1 cup flour
Pinch salt
1 1/4 cups milk
2 eggs
1 tablespoon oil

Mix all ingredients in blender, in stand mixer, with a hand mixer, or by hand and let sit to thicken for at least an hour on the counter.

Heat a heavy skillet on medium high until drops of water sizzle.  Heat a bit of oil or butter on the hot skillet and when skillet is coated add just enough batter to coat the pan (either swirl the pan or use a crepe spreader).  "Fry" until cooked through and flip to brown on the other side.  If you want to make all the crepes at once, keep them warm in the oven set to 200 degrees.  Serve rolled up with favorite jam, Nutella, and/or powdered sugar.

Leftovers can be chopped up t o crisp pieces and served with powdered sugar.
Related Posts with Thumbnails